Not known Incorrect Statements About Greenhouse Construction

Greenhouse Construction - The Facts


You can opt for lightweight pass doors or insulated ones. The lighter-weight doors make leaving and entering easy and quick, but they don't offer a lot of protection from the outdoor elements. An insulated door can do a better job of keeping heat inside and cold air out. Insulated doors are a bit larger and can be a bit harder to open and close.


Greenhouse constructionGreenhouse construction
If you don't want to activate the shutters manually, you can have these portions of the end walls automated. Automated activation would limit the amount of active climate control monitoring you'd have to do - Greenhouse construction. After you've settled on your hoop house end wall plans, you can get down to the actual construction


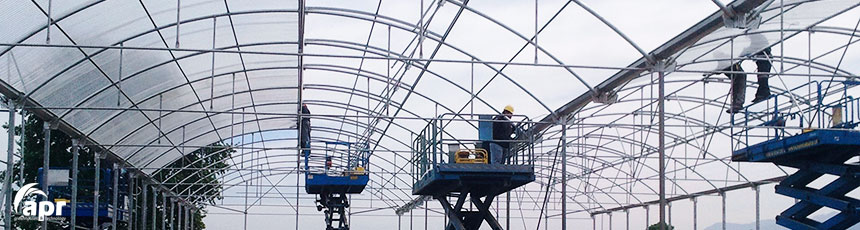
Putting the structure together should be relatively simple, with the greenhouse end wall design process out of the way. One thing to keep in mind is that the construction below is for plain greenhouse end walls. These instructions for building a greenhouse end wall don't accommodate extra parts like fans and gables.


Greenhouse constructionGreenhouse construction
The bottom plank is the top of the door. Now you need to find the middle of the left side of the hoop pipe. You’ll start from the top of the hoop house and the point where it connects with the ground frame. This spot is where you’ll attach your plumb bob.


The Best Guide To Greenhouse Construction


You need to repeat this step on the right of your entryway. Take another curved edge piece of wood and place it facing up at the previously marked left point. Make sure the wood lines up with the ground pencil mark and press until the hoop piping slides into the curved edge.


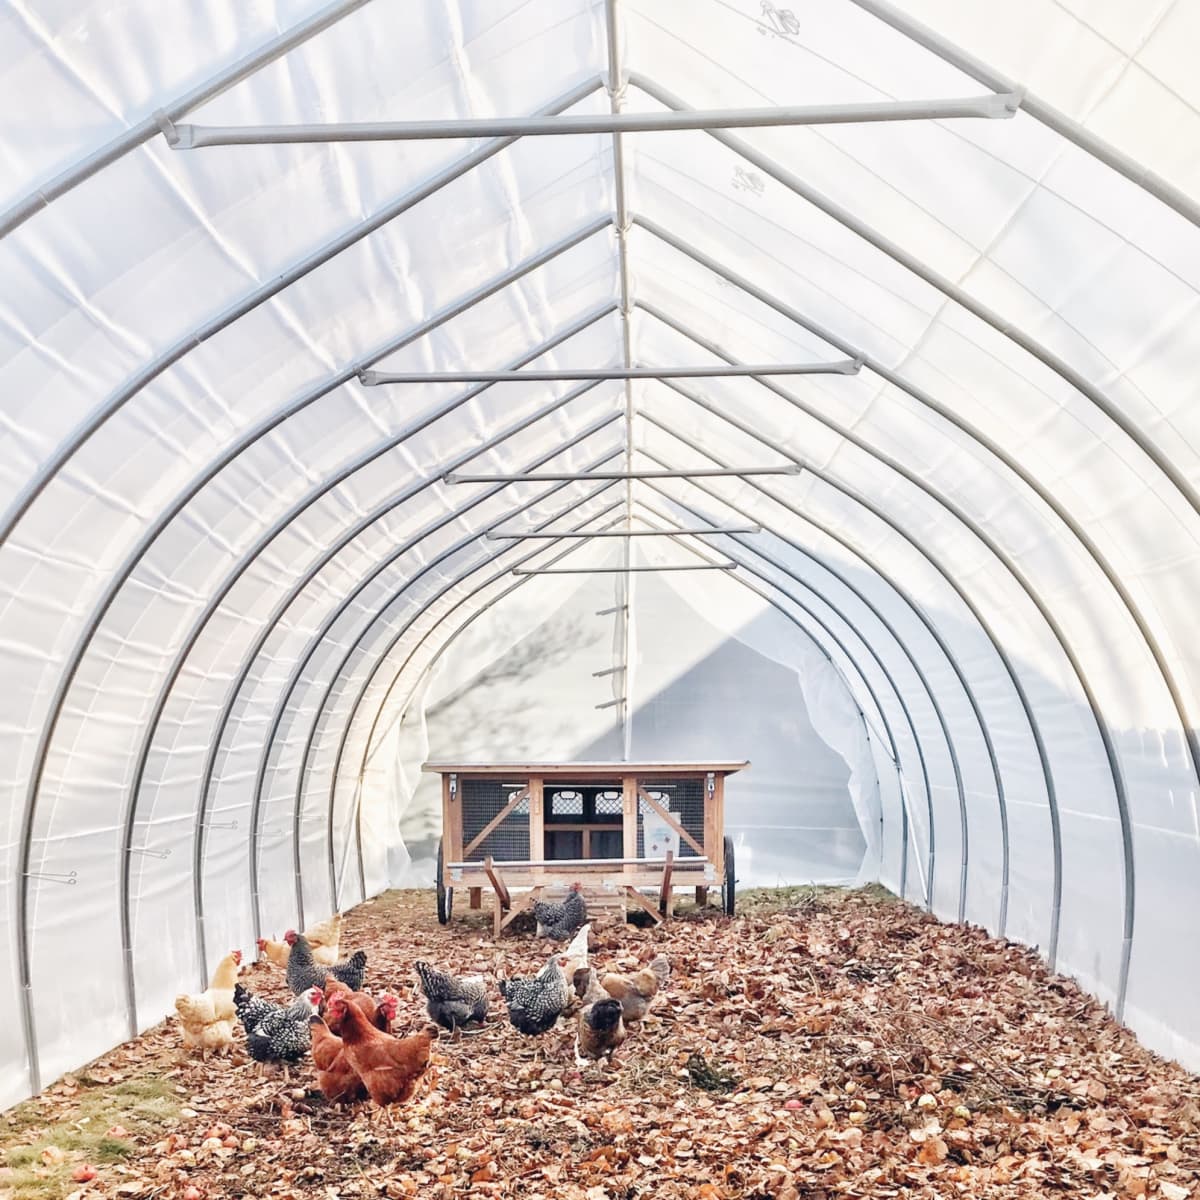
You should repeat this step on the right side of the end wall. Once done, the wall should be sturdy and solidly built. There are various types of greenhouse-like structures. Greenhouses and hoop houses, in particular, are very popular (Greenhouse construction). The significant difference is that hoop houses are easier and cheaper to DIY build


When constructing either building, one thing to keep in mind is that the end wall needs to be sturdy. If you need any more greenhouse-related assistance, you can contact us at Farm Plastic Supply.


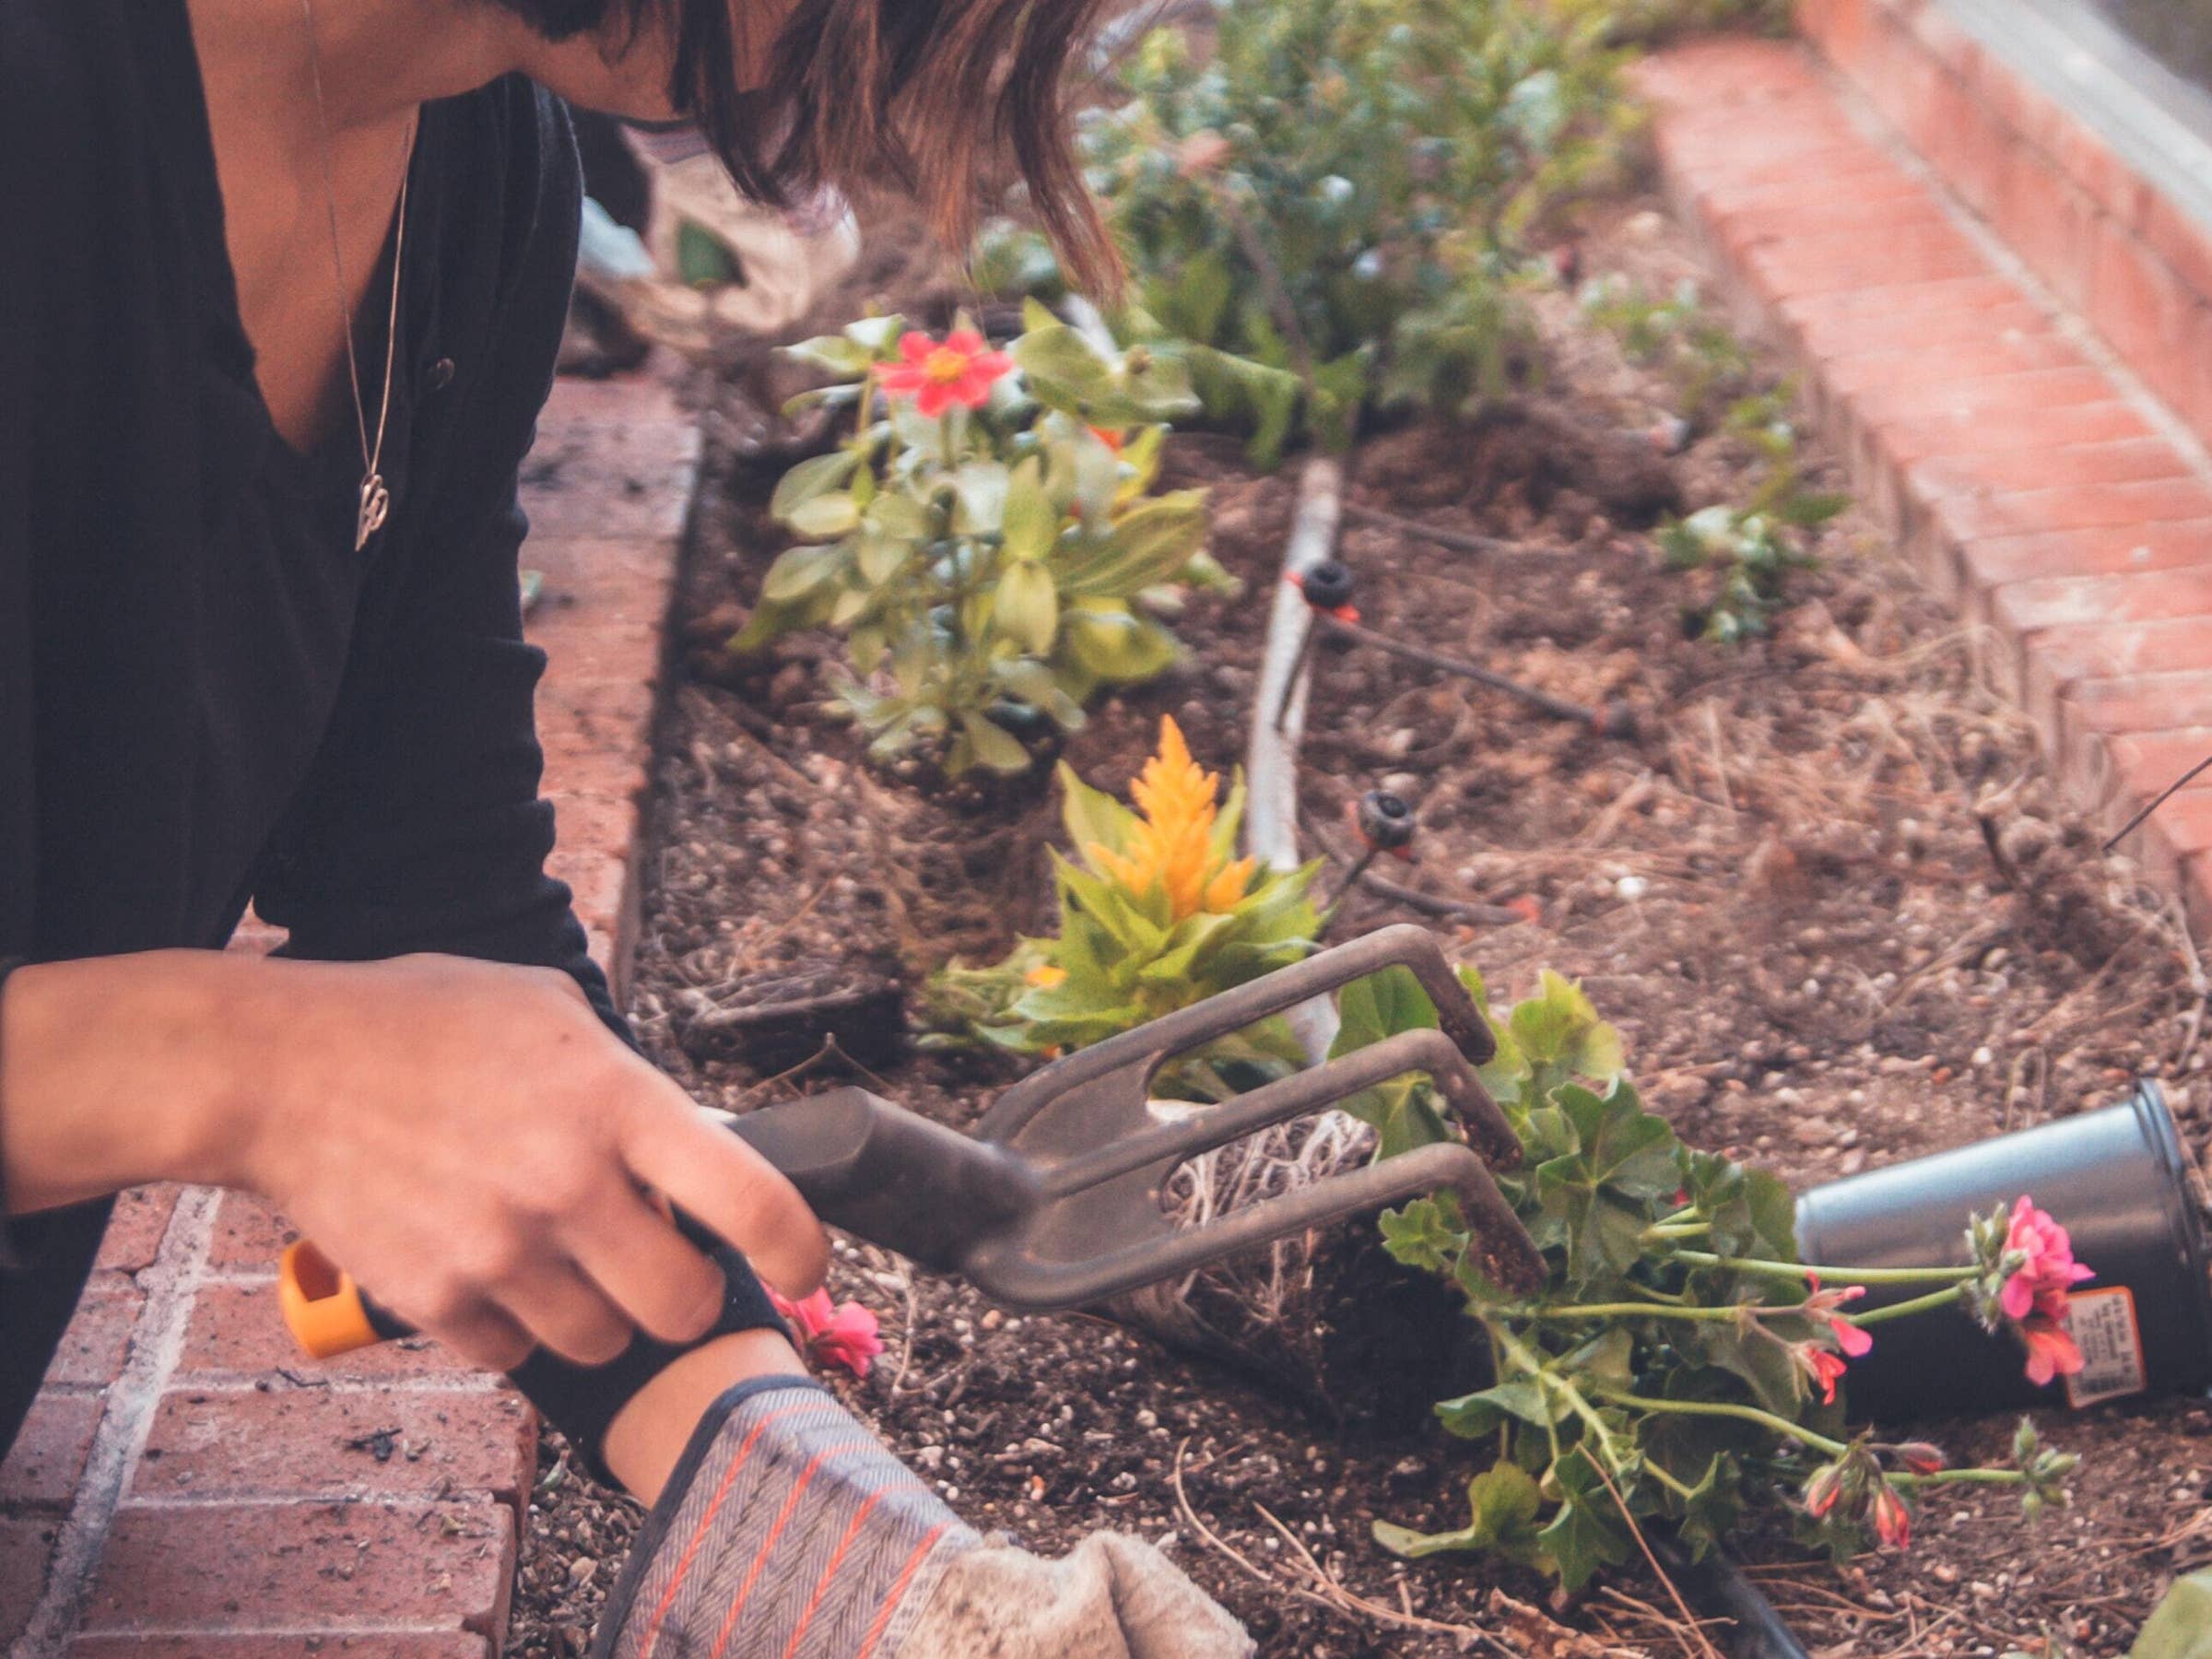
I do not have a green thumb. The only plants I have any luck with are the ones that can be sawn into boards. My wife has two green thumbs, maybe three. She can grow anything. In our early life together she would, in her shy way, ask me to build helpful garden projects and, in my busy way, I would half pay attention to her requests.


Getting The Greenhouse Construction To Work


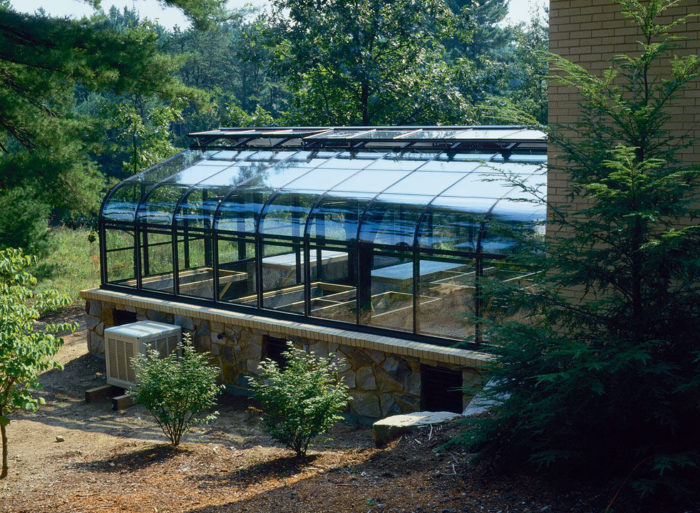
The investment in such a project is considerable, and building it as a separate structure is the click this site conventional way to go. However, we decided to make it an integral part of our home after researching the advantages of an attached greenhouse. We built ours 50 feet long and 9 feet wide, 450 square feet in area and about 3,000 cubic feet in volume.


There are three doors, one into our house and one on each end wall. Screened vents and lots of glass make up the south-facing wall. It has lived up to our expectations. In fact it has an extra advantage. Guests love it. My wife, Jen, can entertain them for hours out there if they are fellow green thumbers.


Ours is a solar greenhouse, and we live in the north country. Even so, the only slow growing time is from late December to early March when even cool weather crops sometimes need to be covered. On a frigid but sunny day the greenhouse warms up and the plants are happy.


In late fall Jen brings some garden plants back in to extend their production time. All summer the greenhouse produces vegetables—some that normally grow in a much warmer climate and others I’m not sure grow anywhere else on this planet. Jen is really good. Plus she grows flowers and herbs with names I can’t pronounce.


Greenhouse Construction Fundamentals Explained


Foundation wall rises above ground and house wall has been stripped to the sheathing. Note the large area of the house foundation that will be painted green for solar gain. From my perspective as a builder there was another very important benefit for adding this addition to the house. It is a serious source of heat for our home.


Opening the connecting door lets heat pour into the house for hours. How much heat? We have a 3000 square foot house. We heat it with four or five cords of wood, which covers about half important source our heating requirement for the year. The greenhouse, with help from the windows above it, supplies the rest.


That is a saving for us of $1000 to $1250 this winter. In addition to food and heat, the quality of air in our house is healthier. If you know about the good effect a dozen house plants using up carbon dioxide and releasing oxygen has on an interior space, imagine how much better it must be with a few hundred plants.


This doorway along with two small vents (with covers) between the greenhouse and the main house control air circulation. I can think of more good reasons to build a greenhouse onto the side of a house. In addition to gaining food, heat, click here to find out more and fresh air, having a new source of entertainment, and saving on fuel costs, we spent less on materials and labor by building against the side of our home than had we erected a four-sided freestanding greenhouse.


Greenhouse Construction - The Facts


The range of skills needed to build a project such as this are very much like those needed to build a house. If you don’t have all of them you could contract out the foundation, wiring, plumbing—whatever mystifies you—but much of it you can do yourself. Plan accordingly. The first decision to make is where to attach the greenhouse.


Most of what I write about here is for adding a greenhouse to an existing home, but there are ideas for everyone. The south wall is the most obvious and best location, but if, like our house, the walls do not align perfectly north, south, east, and west you must chose the best you can.


We discussed the possibility of a wrap-around greenhouse, but decided the slight extra sun exposure and cost did not support it. Your situation may be different. Perhaps a true south-facing corner on a small house would call for a wrap-around. Be aware, it is possible to build a greenhouse that is too big.


How Greenhouse Construction can Save You Time, Stress, and Money.

Not known Details About Greenhouse Construction


It should be noted that comparing tomatoes with very limited maturity differences was a rather demanding problem. From Table 12. 2 it can be seen that, although the error rate increases from 0. 19 to 0. 36 when using different light sources, it is still considerably below the 0. 51 for RGB under the same light source.


36 is still very high. The main reasons for this high error rate are the rather small differences in maturity (one-day difference) and non-uniform ripening of the tomato. If tomatoes are classified as whole objects, using majority voting of the pixels, all tomatoes are correctly classified based on the hyperspectral images, and only one tomato is wrongly classified using the RGB images.


Tomatoes are spherical objects with a shiny, waxy skin. Since high intensity illumination is required for hyperspectral imaging, it is almost impossible to avoid specular patches on the tomato surface. Pixels from these specular patches do not merely show the reflection values of the tomato, but also exhibit the spectral power distribution of the illumination source.


The 2-Minute Rule for Greenhouse Construction


Since a tomato fruit is a spherical object, the above-mentioned effects play a role in the images. Because the training pixels were randomly taken from the whole fruit surface, the positive effect of normalization could possibly be achieved in the color-constant images using linear discriminant analysis. In situations where the training pixels are taken from positions on the tomato surface that are geometrically different from the validation pixels, it is expected that normalized hyperspectral images would give a better result than color-constant spectra.


However care should be taken not to include specular patches. The accuracy of hyperspectral imaging appeared to suffer slightly if different light sources were used. Under all circumstances, however, the results were better than those for RGB color imaging under a constant light source. This opens possibilities to develop a sorting machine with high accuracy that can be calibrated to work under different conditions of light source and camera.


The total experiment was repeated three times with each time a new random selection of 1000 pixels from each tomato. The average errors from these experiments are plotted in Figure 12. 4.FIGURE 12. 4. Classification error and apparent error for Fisher LDAFrom Figure 12. 4, it can be seen that the nearest mean classifier (nmc) is less suitable for these data.


More About Greenhouse Construction


A drawback of the Parzen is that it is very expensive in terms of computing power and memory usage when this classifier is trained. Greenhouse construction. For real-time sorting applications, however, classification speed is more important than that site training speed. For these three classifiers, classification speed depends mainly on the dimensionality of the data and hardly on the kind of classifier


Greenhouse constructionGreenhouse construction
Training the classifier is part of the calibration; therefore a classifier that can be quickly trained is preferable to slower ones. Processing time for training the Fisher classifier with 500 pixels per class (2 500 total) was 12 seconds, for the nearest mean classifier this was less than 100 ms.


Another important conclusion that can be drawn from Figure 12. 4 is that the number of training objects needs to be sufficiently high. When for instance 40 pixels are used for training the Fisher LDA classifier, the apparent error is zero, while the classification error is almost 0. 7. This is due to the fact that when fewer training samples are used, the classifier is completely trained to the noise in the data.


More About Greenhouse Construction


Greenhouse constructionGreenhouse construction
For the Parzen classifier this effect is less distinct but it is clear that the classification error is smaller when a large number of training pixels is used..


Lay the correct foundation for your greenhouse, Image: Jasiek03/Shutterstock The base must be secured to the ground, if it is not then it will be able to move, or in the worst possible scenario, the whole greenhouse could be lifted off the ground in high winds – with disastrous consequences! Take the time to consider the positioning of your greenhouse and assess the soil underneath it, if it is light and sandy then concrete or slabs is the only choice you will have.


It might be necessary to support the frame in place whilst the concrete goes hard. This will only be suitable for greenhouses up to 8ft x 10ft, as larger than this size will mean the weight of the frame and glass would slowly push the base into the ground, especially after wet weather.


The smart Trick of Greenhouse Construction That Nobody is Talking About


Ensure always that slabs or blocks are fixed down firmly, using a cement mixture that will become solid. Laying blocks or slabs on sand alone is not advised as it will wash away and make the base unstable (Greenhouse construction). In all cases, the greenhouse base must be fixed to the slabs or concrete using heavy-duty rawlplugs and screws


A concrete base will be the most durable and foundation for greenhouses, Image: Allotment Book By far the most their explanation practical and durable foundation for any this greenhouse is a solid concrete base. A good option for large greenhouses and can be set above ground level quite easily. It can be very easily maintained and kept clean and tidy with a broom, washed down when needed with detergent to prevent any unwanted diseases.


Standing water may be a problem, as the water can only drain away around the edges of the greenhouse base, alternatively, drilling drainage holes may stop any problems. This is probably the most expensive option, but once any shuttering is put in place to pour the concrete inside of, it is relatively easy to construct.


The Definitive Guide to Greenhouse Construction


Central to the mission of The Green House® Project (GHP) is the development of Green House homes that are built in partnership with forward-thinking eldercare providers, developers, and advocates. Since the Green House model’s inception 20 years ago, nearly 400 homes have been built in 32 states, with more on the way.


Some homes offer post-acute rehab while others are assisted living and dementia care settings. In addition to having an organizational structure that is radically different from other settings, Green House homes are small in scale, self-contained, and self-sufficient, with elders at the center. Each home includes private rooms and bathrooms for all elders, a living room with a fireplace, and outdoor spaces that are easy to access and navigate.


The 10-Second Trick For Greenhouse Construction

Some Ideas on Greenhouse Construction You Need To Know


Greenhouse constructionGreenhouse construction

Of all the parts of your greenhouse, the foundation is the most important if you want it to be permanent and strong…just like your house. You may choose to have a contractor do this job. You need a poured concrete or block wall down below frost line with a good footing.


I hand dug a ditch four feet down to bedrock and built a concrete block wall from there to two feet above grade and filled all the cores with rebar and concrete. I also embedded threaded lag bolts in some of the block cores for securing the plates of the walls that would be built on top.


It took a lot of work but I was young and ambitious then. This foundation wall is under all three sides of the greenhouse addition. It isolates the earth inside, holds some heat, and keeps out frost and animals that like to dig tunnels. A lot of fragile glass is dependent on a solid, stable foundation.


While the foundation is being built is the best time to remove the old earth inside the greenhouse footprint and replace it. We had sand as fill around our house foundation when it was built. In the greenhouse footprint, we dug some of that away and left some for a base, then added Jen’s special soil mix on top.


The smart Trick of Greenhouse Construction That Nobody is Discussing


Greenhouse constructionGreenhouse construction
It will save you a lot of hard work. This is the time to attend to any utility items that need to be buried. In our case, the main sewer pipe runs from the house through the earth of the greenhouse, through the foundation wall, and out to the septic tank.


The sink has been very useful. A working greenhouse really needs an area with a sink, counter, and shelves. I don’t recommend burying wires in the greenhouse, but if you must, be sure they are protected inside some tough metal or plastic pipe. Greenhouse construction. Be sure to put a notice up on the wall with a map indicating where they are located


Greenhouse constructionGreenhouse construction
It was never put in and has not been missed. Okay, the foundation walls are done, the soil is in place, and it is time to build the main structure. Prepare the house wall by removing the siding to expose the sheathing in the area where the greenhouse will be attached.


In the pictures and drawing you can see the three sections of our addition: the lower window wall resting on and bolted to the foundation wall, the slanted big windows making up most of the ceiling, and the roof that is attached to the house wall. The actual dimensions of your greenhouse will be custom designed for the materials, size, and area involved in your project, so my how-to advice is meant to give you ideas and methods to use rather than exact plans.


Facts About Greenhouse Construction Revealed


It is expensive and there is so much excellent pre-owned glass available cheap or free for the taking that I look for that first - Greenhouse construction. I used some double-hung, double-glazed windows from my stash for most of the front window wall. They were installed on their sides with the screens in place


It is a handy work platform while building and makes the exterior upkeep of that whole wall above it, and washing all those big windows, less complicated during the life of the house. The roof deck must be very sturdy. I framed it with 2x6s and decked it with ¾-inch plywood.


Like I said, build it sturdy. If you have been careful with your measuring and building and have not indulged in too much spontaneous construction, your lower window wall will be perfectly aligned horizontally and vertically with your roof deck so the rafters that connect them will all be exactly alike, fit perfectly, and accommodate the big windows to be installed on top of them.


I want to take a paragraph or two to let you in on a way to find the best glass ever for a greenhouse. The ones we used are 34″ Discover More Here x 75″ tempered glass. Of all the sizes of tempered glass available, that is the most common because it is used in sliding glass doors and those window walls you often see where people have a view, a deck, a swimming pool, or whatever, to gaze upon while sipping martinis.


The Greatest Guide To Greenhouse Construction


Find him and make an offer on the old ones. I did this once and got 18 (count ’em x 2) fogged windows free just for hauling them away. You can find them at junk shops…excuse me, Architectural Antique Shops. Try the dump…or rather, Transfer Station. Ask around. I once found a supply of tempered glass this size at a mobile home supply store.


Its Achilles Heel is the edge. If you tap the edge with metal the whole pane shatters to pieces. Be aware of this as you handle the glass. This is a broad view of the greenhouse during construction. Note the lower window wall, stone wall, stop blocks, and window clamp boards and the roof deck which makes window washing easier.


I am going to show you a way to build these rafters differently than my originals. I woulda, coulda, shoulda done it this new way but you can learn from my experience. Plan the spacing between centerlines of the rafters. My glass was 34 inches wide. I want a 1-inch space between the panes.


Be very accurate about this 35-inch measurement as you build. Note: my knee braces under the roof deck line up with these rafters. Here is the difference between my old way and the new improved version. Way back then, I used single 2x6s as rafters. It worked, but not very well.


The Basic Principles Of Greenhouse Construction


I recommend you use doubled 2x6s or doubled 2x4s as rafters. That means the top of the rafters will be three inches wide and provide an ample supporting surface for view publisher site the glass panes while leaving a one-inch space between them. You may think more is better and consider using larger sized rafters but don’t.


Doubled 2x6s or doubled 2x4s are strong enough. Of course, use the best quality lumber for these rafters. Get good straight ones with few or no knots. Cutting the rafters to size takes good carpentry skills. There are angle cuts on each end and the dimensions have to be very accurate.


When you double up these rafters, make sure they are securely attached to sites each other with screws. In fact, use screws for attaching the rafters to the rest of the building too. Screws resist the push and pull of strains on the structure much better than nails, and if something needs changing or fixing later, screws are easier and neater to extract and reuse.


Before attaching the rafters, cut a piece of 90# rolled roofing 18 inches wide, and drape it over the whole length of the 2×8 top plate of the lower window wall. This covering will drain rainwater away on the outside and condensation away on the inside. This is an important detail.


The smart Trick of Greenhouse Construction That Nobody is Talking About

Fascination About Greenhouse Construction


It should be noted that comparing tomatoes with very limited maturity differences was a rather demanding problem. From Table 12. 2 it can be seen that, although the error rate increases from 0. 19 to 0. 36 when using different light sources, it is still considerably below the 0. 51 for RGB under the same light source.


36 is still very high. The main reasons for this high error rate are the rather small differences in maturity (one-day difference) and non-uniform ripening of the tomato. If tomatoes are classified as whole objects, using majority voting of the pixels, all tomatoes are correctly classified based on the hyperspectral images, and only one tomato is wrongly classified using the RGB images.


Tomatoes are spherical objects with a shiny, waxy skin. Since high intensity illumination is required for hyperspectral imaging, it is almost impossible to avoid specular patches on the tomato surface. Pixels from these specular patches do not merely show the reflection values of the tomato, but also exhibit the spectral power distribution of the illumination source.


Greenhouse Construction Can Be Fun For Everyone


Since a tomato fruit is a spherical object, the above-mentioned effects play a role in the images. Because the training pixels were randomly taken from the whole fruit surface, the positive effect of normalization could possibly be achieved in the color-constant images using linear discriminant analysis. In situations where the training pixels are taken from positions on the tomato surface that are geometrically different from the validation pixels, it is expected that normalized hyperspectral images would give a better result than color-constant spectra.


However care should be taken not to include specular patches. The accuracy of hyperspectral imaging appeared to suffer slightly if different light sources were used. Under all circumstances, however, the results were better than those for RGB color imaging under a constant light source. This opens possibilities to develop a sorting machine with high accuracy that can be calibrated to work under different conditions of light source and camera.


The total experiment was repeated three times with each time a new random selection of 1000 pixels from each tomato. The average errors from these experiments are plotted in Figure 12. 4.FIGURE 12. 4. Classification error and apparent error for Fisher LDAFrom Figure 12. 4, it can be seen that the nearest mean classifier (nmc) is less suitable for these data.


The Ultimate Guide To Greenhouse Construction


A drawback of the Parzen is that it is very expensive in terms of computing power and memory usage when this classifier is trained. Greenhouse construction. For real-time sorting applications, however, classification speed is more important than training speed. For these three classifiers, classification speed depends mainly on the dimensionality of the data and hardly on the kind of classifier


Greenhouse constructionGreenhouse construction
Training the classifier is part of the calibration; therefore a classifier that can be quickly trained is preferable to slower ones. Processing time for training the Fisher classifier with 500 pixels per class (2 500 total) was 12 additional reading seconds, for the nearest mean classifier this was less than 100 ms.


Another important conclusion that can be drawn from Figure 12. 4 is that the number of training objects needs to be sufficiently high. When for instance 40 pixels are used for training the Fisher LDA classifier, the apparent error is zero, while the classification error is almost 0. 7. This is due to the fact that when fewer training samples are used, the classifier is completely trained to the noise in the data.


The 10-Minute Rule for Greenhouse Construction


Greenhouse constructionGreenhouse construction
For the Parzen classifier this effect is less distinct but it is clear that the classification error is smaller when a large number of training pixels is used..


Lay the correct foundation for your greenhouse, Image: Jasiek03/Shutterstock The base must be secured to the ground, if it is not then it will be able to move, or in the worst possible scenario, the whole greenhouse could be lifted off the ground in high winds – with disastrous consequences! Take the time to consider the positioning of your greenhouse and assess the soil underneath it, if it is light and sandy then concrete or slabs is the only choice you will have.


It might be necessary to support the frame in place whilst the concrete goes hard. This will only be suitable for greenhouses up to 8ft x 10ft, as larger than this size will mean the weight of the frame and glass would slowly push the base into the ground, especially after wet weather.


Not known Facts About Greenhouse Construction


Ensure always that slabs or blocks are fixed down firmly, using a cement mixture that will become solid. Laying blocks or slabs on sand alone is not advised as it will wash away and make the base unstable (Greenhouse construction). In all cases, the greenhouse base must be Visit This Link fixed to the slabs or concrete using heavy-duty rawlplugs and screws


A concrete base will be the most durable and foundation for greenhouses, Image: Allotment Book By far the most practical and durable foundation for any greenhouse is a solid concrete base. A good option for large greenhouses and can be set above ground level quite easily. It can be very easily maintained and kept clean and tidy with a broom, washed down when needed with detergent to prevent any unwanted diseases.


Standing water may be a problem, as the water can only drain away around the edges of the greenhouse base, alternatively, drilling drainage holes may stop any problems. This is probably the most expensive option, but once any shuttering is put in place to pour the concrete inside of, it is relatively easy to construct.


Excitement About Greenhouse Construction


Central to the mission of The Green House® Project (GHP) is the development of Green House homes that are built in partnership with forward-thinking eldercare providers, developers, and advocates. Since the Green House model’s inception 20 years ago, nearly 400 homes have been built in 32 states, with more on the way.


Some homes offer post-acute rehab while others are assisted living and dementia care settings. In addition to having an organizational structure that is radically different from other settings, weblink Green House homes are small in scale, self-contained, and self-sufficient, with elders at the center. Each home includes private rooms and bathrooms for all elders, a living room with a fireplace, and outdoor spaces that are easy to access and navigate.


8 Simple Techniques For Garden Mowing

Indicators on Ndis Gardening Services You Should Know


Communication permits you to fulfill your customers service expectations. Further, active paying attention skills use you the capability to comprehend what your clients requirements and what they want.


Aside from clear and also efficient communication with consumers as well as clients, you ought to likewise keep healthy and balanced interaction with your group to make sure that you can lug out directions based on the job requires - NDIS Gardening Services. As a gardener you should have supervisory skills to take care of budgets, garden equipment, use of yard machinery and material that you would certainly need to lug out a particular job.


Over the previous few months, hedges will certainly have been expanding intensely however growth ought to currently be beginning to slow. Autumn is the ideal time to provide your bushes a great trim, particularly as the colder, damper air starts to resolve in. By getting rid of the summer growth, you'll help keep vegetation thick and also areas of woody growth controlled.


Fall can be a complicated time to trim the lawn, particularly if wet days are making a normal appearance. Among the most frequently asked questions concerning gardening during autumn and wintertime is whether it's alright to mow wet yard - as well as the straightforward answer is, yes. It's constantly less complicated to cut completely dry yard, so the begin of fall is the finest time to provide your lawn an actually great cut.


The Buzz on Body Corporate Property Maintenance


Among the most effective aspects of cleaning down outside surfaces with a stress washing machine in the autumn is that it aids get rid of any type of moss, lichen as well as algae - which can end up being super unsafe in autumn and also winter. While the weather is still sensibly good, currently is a good time to also clean down yard furniture, Barbeques and also youngsters play tools prior to storing it away.


Aim to obtain begun while the yard is dry to the touch however moderately wet under the surface area (a day or 2 after rain is ideal). Next, mow your lawn on a low setup to make it simpler to reach the ground surface and enhance air movement.


Commercial GardeningAged Care Gardening
Make sure you wear a set of suitable handwear covers. Our homeowner as well as expert garden power devices are developed to stand the test of time, aiding you remain on top of mom nature.


Much like the inside of your Adelaide residential property, your yard also requires regular upkeep as well as care. Who would certainly not desire to have a clean, see this stunning yard all year round? The best horticulture will offer your Adelaide property with an added room that you could take advantage of. It can work as an entryway that welcomes your guests with a pleasant fresh sensation.


Indicators on Body Corporate Property Maintenance You Should Know


On the various other hand, a well-kept garden is simple on the eyes. Your front grass is the very first point your guests see, as they enter your residential property. As a result, you require it to look well-tended to make a favorable impression on them. Regular gardening indicates that your plants will certainly get evaluated frequently.


Regular gardening jobs can be tough as well as taxing. In addition to watering, your Adelaide garden needs many various other things to flourish as well as remain healthy and balanced. At Guaranteed Yard Services, we understand that not everyone has time to frequently observe the size and also wellness standing of the plants, grass and also blossoms at your Adelaide garden.


Aged Care GardeningGarden Mowing


You'll want to mark down anticipated prices for any type of brand-new plant life you plan to integrate right into your yard. Services, it would certainly be smart to track this quantity.


Squeezing is basic as well as includes using your fingers to pluck out dead components of your plants. The 2nd cut is understood as heading which is accomplished by cutting a farther on the plant, below the leaf.


The Basic Principles Of Aged Care Gardening


The objective is to moisten your yard with around one as well as a fifty percent inches of water. honda hrr216 There are numerous commercial products that will aid you to free your garden of bugs. These pesticides are horrible for the earth and are not suggested for anybody attempting to protect our environment.


Plants have a tendency to have various requirements depending upon their varieties. You can utilize a p, H strip to identify level of acidity or send an example of your soil to be evaluated.


These types are a lot more most likely to flourish and also actually give your garden the stunning appearance it should have. Garden care is greater than just staying up to date with your flowers as well as grass. Hard surface areas such as the patio area or concrete should likewise be maintained - Commercial Gardening. You can maintain these locations devoid of discolorations by using a pressure washing machine.


Gardening ServicesLawn Mowing
If you have a deck you over here can opt to move and also scrub the location instead. In addition, you'll wish to examine your fence for any broken posts as well as repaint if required. To actually make your garden shine, take into consideration adding some added aspects. New lights, smaller sized fence, stones, and also other decors are reasonably inexpensive.


1 2 3 4 5 6 7 8 9 10 11 12 13 14 15